Saturday, 13 April 2013

Easy Peasy White Chocolate and Rasberry, Brioche Pudding!

This is such a quick and easy recipe that seriously anyone can do and it will take about 5 minutes to make and 30 to bake. 


I can't take credit for this recipe as it is actually my mum's, it is basically a bread and butter pudding style dessert made with brioche, raspberries, eggs, creme fraiche and white chocolate.
 
You will need, Brioche, Frozen Raspberries, Three Eggs, Creme Fraiche and White Chocolate Buttons.

You can really make it any size you need so there is no exact measurements.
 
Tear up your Brioche and layer in an oven proof dish, then sprinkle with the raspberries and white chocolate buttons. I haven't given you any measurements as it also depends on what you like. For example my brother likes less fruit, I like more. My mum likes less white chocolate, I like ... yes, more!

 
Depending on the depth of your dish you can repeat the process by doing another layer on top, that is what I did.

Then you need to make your liquid mixture. Crack three eggs, (if you make a smaller pudding any less than about a pack of brioche use less mixture so say two eggs and smaller quantities of the other liquids as well) into a bowl or jug and beat, then add about a tub of creme fraiche, if you like you can always make this pudding a bit more grown up by adding some liqueur, limoncello is good.

 
Pour this all over your pudding, leave to sit for 5 minutes, then bake in the oven. I have an aga so it went in the top (about 180DegreeC) for 10 minutes and then down in a cooler oven for about 20 minutes. I would suggest you know your oven best but cook at about 150DegreesC for 30 mins.

You should see the top has browned slightly and the liquid has set, a bit like baked custard. This can be eaten Hot, Warm or Cold.

I took this to a friends dinner party for desert and it when down a treat, alongside a lot more chocolate (cause we were all girls) and a cheesy movie, The Sisterhood of the Travelling Pants!

Precious Cargo :)


Enjoy :) It's a Must

Tuesday, 9 April 2013

Caramel Macchiato Cupcakes!

It seems I had a baking stroke of genius when I decided to make these, people just can't get enough!

These are coffee, caramel cupcakes ... Yum!  They look beautiful and contain a yummy gooey caramel surprise in the middle :) Pause for the drooling!


You will need:

125g Butter (Goats butter for cows milk free)
125g Caster Sugar
125g Self-Raising Flour
2 Large Eggs
2 Tbsp Camp Coffee Essence

For the Filling and icing:

125g Butter
250g Icing Sugar
2 Tbsp Camp Coffee Essence
Approx 200g Caramel
And decorations of your own choice

I used, Dr. Oetker soft gold pearls, milk and white chocolate stars, edible gold stars and chocolate.

1.  Cream together the butter and sugar until light and fluffy. 


2.  Add one egg at a time mixing after each addition. 


3.  Sift the flour into the bowl and add the coffee essence, gently fold together. 

4.  Spoon the mixture into twelve cupcake wrappers in a baking tray. 


5.  Bake at 180 Degree C for approximately 15 minutes.  Until a skewer comes out clean. 


6.  Leave to cool in the tray for 5 minutes then transfer onto a wire cooling rack. 

7.  Once cool, use a knife or a cutter to remove the middle of the cakes, not through to the base. 

8.  Spoon caramel into the empty space. 


9.  Cream together the butter, coffee essence and icing sugar, you can use an electric mixer if you like and transfer into a piping bag. 

10.  Pipe the icing on top of the cakes.  You can pipe as much or as little as you like. 


11.  Then decorate.  I melted some dark chocolate to drizzle on top, you could use milk or not use at all.  Using dark adds a bitterness that some people like.  If you are going to do this I suggest doing it before you put on your decorations for the nicest look. 


TAAA DAAAAA!

Enjoy!


Saturday, 6 April 2013

Butternut Squash Muffins with Lavender Icing


I thought I would post this recipe which is one of my favourite recipes that I make over and over again.  These my bee's are Butternut Squash muffins.  Yes Butternut Squash, the veggie!  Don't be fooled by that they taste amazing and go down a treat.  Don't worry if you don't like butternut quash either because that honestly doesn't mean you won't like these.  I have also made the same recipe with pumpkin before which worked just as well. 

They sound strange, I know, but they taste amazing.  Plus you can always justify these little pieces of heave by saying 'It's got vegetables in it!' Bonus !

If you have a food processor these are so easy to make, but don't worry if you don't have one you can still make them as I did before I got a processor. 

You will need:

400g Butternut Squash
350g of Demerara Sugar
4 Large Free Range or Organic Eggs
2 heaped tsps Baking Powder
1 tsp Ground Cinnamon
Pinch Salt
Handful of Nuts ( walnuts are really good, I actually quite like Brazil nuts if I have them in I really think they add something)
160ml of Olive Oil


1.  Start by processing 400g of butternut squash, skin on until finely chopped. If you don't have a processor you can always put it in the oven to bake it until it is soft enough for you to scoop the flesh out and mash it. 


2.  Add 350g of demerara or soft brown sugar and crack in 4 large free range or organic eggs.

3.  Give it a quick pulse or stir to combine. 

4.  Then add 300g of plain flour, 2 heaped teaspoons of baking powder, 1 teaspoon of ground cinnamon, a pinch of salt, the handful of nuts and finally 160ml of olive oil.

6.  Mix this all together until combined. Don't over work the mixture, you just want to combine the ingredients nicely.

This mixture should make over 12 muffins. I normally make 18 out of this, but last night when I made them I  made 16 larger ones.

7.  Use muffin cases and fill to about 3/4 of the way, then bake. I have an aga and I just put them in the middle to bottom of the top oven and bake for about 30 minutes, really I bake by eye so look for the signs. (This is equivalent to about 180/200 Degrees C I believe.)


8.  You want them nicely coloured and crisp on top and use a skewer to see if they are cooked all they way through. If you don't have an aga I would suggest putting them in the oven at 180 and then just cook with love like i do. If you watch them and check them then you will be guaranteed gorgeous muffins in the end :)


9.  Once your muffins are done and looking gorgeous like the ones above, remove them from the oven and cool on a wire cooling rack.

10.  When the muffins are cool you can now ice them.

I suggest making the icing while you wait for them to cool, give you something to do. I never use measurements when I make icing I just tend to do it by eye. 

For these muffins I just make a slightly runny royal icing with icing powder and either lemon or orange juice. Make up the icing and then add some of the zest of the lemon or orange and also, get ready to feel surprised, some lavender!

This is a photograph from my travels to the Isle of Wight taken in the gardens at Osborne House, how beautiful is it?

Yes, Lavender!  I love it, I think it makes them very unique and personally I think the lavender compliments the muffins perfectly.

11.  You can either add the zest and lavender to the icing or just sprinkle on top. 


I really hope someone reads this and bakes these muffins, I just love them!!!!

Monday, 1 April 2013

My First Commission with Instructions and Loads of Pictures

After posting some photos of my Easter Cake Pops on my facebook I received a request for more of the same for an Easter egg hunt. 

I made the same, chicks and the two butterfly variations but then I also decided to get some fondant icing and make some extra decorations. 

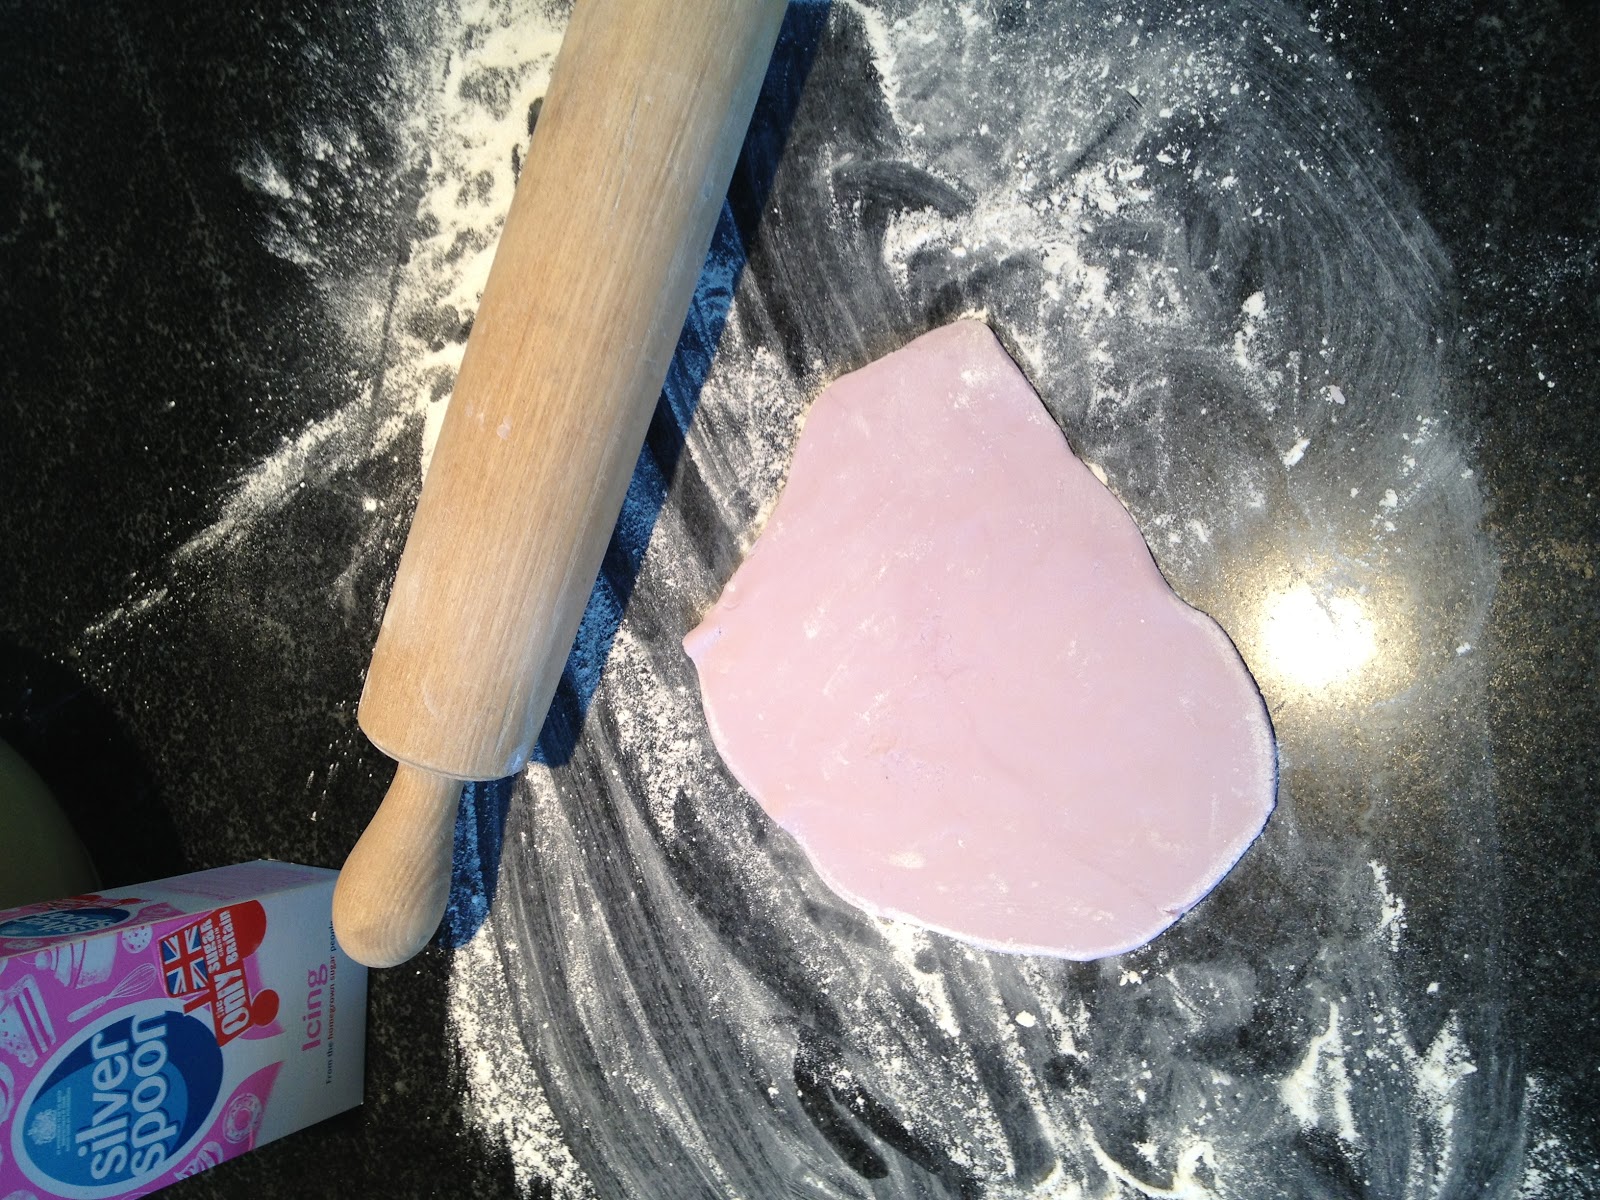
I bought some lilac ready to roll icing and I already had some appropriately themed spring cutters. 

These were a very small daisy shape flower and three different shapes of butterfly.  The butterfly's also left a pretty imprint detail. 


Roll out using a dusting of icing sugar on your surface and rolling pin to stop it sticking.  


Roll out about 3 mm thick.  The choice is yours really, but that's what I did.  
 
Then cut out your shapes :) I did two different things with my butterfly's. 

With some I placed them in folded tin fold to shape them and others I just left lay flat.  Folding them makes the more fragile but can make them look more realistic. 


To decorate the butterfly's I used a few different methods.  Some I wetted with water and then covered with edible glitter and some I pressed sugar pearl balls into. 


I did all this before I made the cake pops so it gave them a change to set a bit. 

I used the same method as with the other cake pops, using the candy melts as glue. 


I wrapped them all in cellophane covers tied with Easter ribbon.  I hope the kids (and the big kids) have fun with these.  I've already had a WOW text message so I'm very pleased :)


Sunday, 31 March 2013

Easter Cake Pops


With university broken up for Easter it seemed the perfect time to get the cake pop maker out and get cracking on some special Easter themed pops.

I decided to buy some yellow candy melts and make the chick pops that I had seen on Bakerella.  Now my baker bees if you do not know who or what bakerella is then go look see.  It is amazing and you have not lived until you have seen some of the tasty and amazingly decorated treats it holds. 

www.bakerella.com

I made the pops chocolate inside as it seemed only appropriate with chocolate being a tradition at Easter.  If you need the recipe for the cake pop sponge just look back a couple of posts to find it...Search 'Chocolate Cake Pops'. 

To make the chicks you will need some small, tiny almost orange, yellow and black decorations.  I used little yellow and orange sugar coated chocolate balls out of a sprinkle mix I had and a black food pen.  The food pen didn't work very well on the candy melts so I would recommend an alternative, such as edible paint or black icing. 

Cover the cake balls with the yellow candy melts, you may need two coats if you have used chocolate sponge as it might show through.  Allow to dry. 

Then use your candy melts like glue for your decorations.  Here are some pictures to illustrate. 

 
I used all different coloured sticks for a fun spring theme. 


Stick 1 orange decoration for a beak, then two for feet.  Then stick a yellow decoration on either side for little wings. 
 

 Then draw / stick on your black eyes :)

As you can see I also made some other spring themed pops. 

I dipped some pops the same as the chicks and left them to dry.  I then ran a line of candy melts around the middle of the pops and rolled them in hundreds and thousands.  Then I used a cocktail stick to dab small spots of candy melts onto the top of the cake pop to which I stuck some sugar butterfly's. 

Others I dipped and then immediately sprinkled with hundreds and thousands and sugar butterfly's. 

These are still great to make for sping treats not just for Easter!

Chocolate SemiFreddo


So here it is.  The Death by Chocolate Semi Freddo. 

This recipe was in the American magazine 'Where Woman Create', published by Stampington and Company's Somerset Studio.  The magazine also credits the Donna Hay magazine and I believe, therefore it is one of her recipes. 

I have made a few alterations, and suggestions that we did instead for ease.

You will need:

For the SemiFreddo:

85g Chocolate Biscuits
350g Dark Chocolate
25g Cocoa Powder
3 Eggs
2 Egg Yolks
1tsp Vanilla Extract
165g Caster Sugar
440ml Single Cream
1/2tsp Sea Salt Flakes

For the Caramel:

250ml Single Cream
60g Butter, Cubed
175g Brown Sugar

Instructions:

1. Lightly grease and line a 22cm x 8cm loaf tine with non-stick baking paper.  Then crush the biscuit and dust the sides and bottom of tin with them. (this was ridiculously hard, they didn't really stick to the sides but that's okay).  I used cling film and baking paper. 

2. Put the chocolate and cocoa in a heatproof bowl over a saucepan of simmering water and stir until smooth. 

3. Places the eggs, extra yolks, vanilla and sugar into a heatproof bowl over a saucepan of simmering water, and using a handheld electric mixer beat for 6-8 minutes or until thick and pale. 

4. Remove from the heat and beat for another 6-8 minutes or until cool. 

5. Whisk the cream until it creates soft peaks.  Gently fold the cream into the egg mixture until well combined. 

6. Pour into the prepared tin. 

 
7. Cover with foil and freeze for 4-6 hours or until firm. 

8. To make the caramel, place cream butter, and sugar in a saucepan over a low heat, and stir until the sugar is dissolved.  Increase the heat to medium, bring to the boil, and cook for 5-7 minutes or until thickened.  Allow to cool. 

9. Slice the semifreddo, drizzle with the caramel sauce, and sprinkle with sea salt to serve. 


Enjoy :) It is easy and sooooo tasty !!!


Monday, 18 March 2013

Seriously Chocolaty Semi Freddo


After a huge Sunday dinner yesterday, I ended up in a mild food coma after one very chocolaty desert. 

It was a Chocolate Semi Freddo served with caramel, and it was seriously YUM!

Bonus too was that it was homemade and I think completely, or very nearly, cows milk free! Hooray for me!

I will be posting the recipe soon, and I will also post a couple of pictures and the Cow milk free alternatives that were used. 

My mum made it so all credit goes to her, I lined the tin and gave some advice so not so much credit for me. 

COMING SOON ...


DEATH BY CHOCOLATE SEMI FREDDO ... WITH CARAMEL :)